Top Selling Extension Winner
2 times in a row
Magento 2 Multi Vendor Dropship
Magento 2 Multi-Vendor Dropship extension enables vendors to ship products from nearby warehouses to customers. Vendors and admin can assign products to warehouses and handle orders.
- Google API key is only needed for auto-assigning warehouse settings.
- Admin can set shipping rules with table rate.
- Warehouse managers handle shipments for approved orders.
- Admin can bulk assign/unassign products to warehouses.
- Vendors can assign a warehouse when adding or editing a product.
- Admin can view the warehouse products.
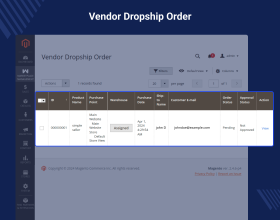
- Admin can filter and search vendor drop-ship orders.
- Assign/unassign a product to many warehouses.
- GraphQL is implemented for the extension.
Top Selling Extension Winner
2 times in a row
- Description
- Reviews
- FAQ
- Customers ()
- Specifications
- Cloud Hosting
- Changelog
Magento 2 Multi Vendor Dropship is a powerful extension. Enables a dynamic multi-vendor marketplace for various vendors to sell products in one online store. This extension allows vendors to ship products to customers using the closest warehouses. The admin can manage many warehouses, set shipping rules based on rates, and save on shipping expenses.
Vendors and admin can assign products to warehouses for efficient inventory management. The extension simplifies order management for vendors and admin, making it easy to handle orders. By integrating Google API, it provides auto-assigning warehouse settings.
Magento 2 Multi-Vendor Dropship transforms the shopping experience with faster shipping. Also, empower vendors to thrive in a collaborative marketplace. Please Note: Installation of Magento 2 Multi Vendor Marketplace is required to use this module. Also, this module does not support compatibility with the Magento 2 Multi Shipping Marketplace Add-on.

Highlighted Features
Quick Warehouse Management
The admin can manage the warehouses from the backend by assigning a warehouse manager, product and shipping rules. Whereas the seller can manage their products in the warehouses.
Nearest Warehouse Shippment
Order placed by the customer will be deliver to them as per their location. That is, the nearest warehouse will ship the order to the customer.
Shipping Rule Management
The admin and warehouse manager can add the shipping rule to manage the orders in a better way.
Setup Email Template
The admin can set a template for order approval and warehouse user new account creation. These mail templates will share with the respective warehouse manager.
Why do we need Magento 2 Multi Vendor Dropship extension?
Magento 2 Multi Vendor Dropship extension helps build a successful multi vendor marketplace. It enables many vendors to sell their products on one platform, offers wide variety of products and attracts more customers. The extension enables efficient order fulfilment by facilitating direct shipping from nearby warehouses. It leads to faster delivery and lower costs.
It simplifies inventory management by enabling vendors to assign products to specific warehouses. With customized shipping rules, customers have a variety of shipping options to choose from. In short, the extension promotes collaboration, growth, and enhanced customer satisfaction. That makes it essential for a multi-vendor e-commerce environment.
For instance, consider our website selling electronics. This extension, Vendor A can ship smartphones from a New York warehouse. Vendor B can ship laptops from a Los Angeles warehouse. It ensures customers receive their products faster, and we can offer competitive shipping rates. The extension simplifies inventory by allowing vendors to track their stock in the assigned warehouses.
In short, it simplifies operations and boosts customer satisfaction. That empowers vendors to succeed in our marketplace. Vendors can also set the delivery day and time for their orders with the help of Magento 2 Delivery Time Slot Marketplace Add-On.
Vendor Dropship Manager
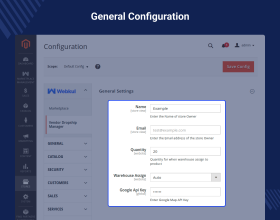
After the successful installation of the module. The admin can configure the settings.
- Enter the Name and Email address of the store owner.
- Set the default quantity for assigned products in a warehouse.
- Set the warehouse assignment as Auto or manual.
- Add Google Maps API for map display.
- Select Yes/No to display the price details in the Order Approval mail.
- Select the Orders Approve email template for the Warehouses.

Add New Warehouse
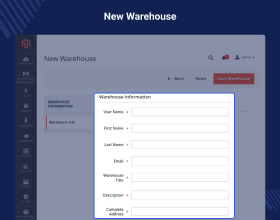
Here, the admin will be able to create many warehouses as required. The admin can delete, edit, and add a warehouse. The admin can view warehouse details such as title, username, description and status. Admin has the option to edit the warehouses. To add a warehouse, the admin will
- Enter username, first and last name of the warehouse manager.
- Enter email address and the warehouse title.
- Enter the description related to the warehouse.
- Enter complete address of the warehouse and select it to auto-fill.
- For this particular warehouse select the allowed shipping method.
- Enter password, for the current warehouse and re-confirm the password.
- Set the account as active or inactive.

Warehouse Order Manager
Here, the admin can approve or cancel any of the orders that have been placed by the customers. In case any order is not assigned to any of the warehouses. The admin can manually assigned a warehouse to the unassigned order. After the order is approved, the warehouse which has the order ships the products to the customer.
- Approve or cancel an order.
- Assign warehouse to an unassigned order. View the order details.

Warehouse Products
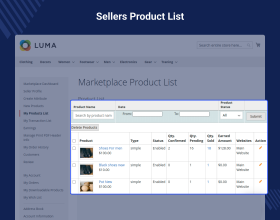
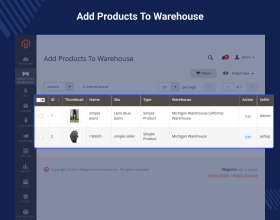
Here the admin can assign/unassign the products to the various other warehouses. The admin can also assign, a single product to many warehouses. For assign the product to a warehouse, select the product, and choose the assign warehouse option from the dropdown menu. From the available options, select the desired warehouse. Only select the warehouse where you want to assign the product and the product assigned
- Assign/Unassign products to warehouses.
- Assign a single product to warehouses.
- Admin can view the warehouse's associated products.
- Admin can bulk assign or unassign products to a warehouse.

Add Shipping Rules
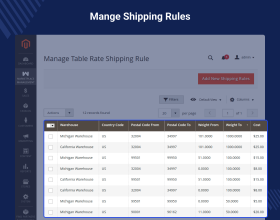
Here the admin can create, delete, and assign the shipping rules to various warehouses. For creating shipping rules, the admin downloads a Sample CSV file and enters value for columns. Like, warehouse name, country code, postal code range, weight range, and applicable cost. Save the CSV file, upload it back and select the warehouse where you want to assign the shipping rules.
- Create, delete, and assign shipping rules to multiple warehouses.
- Download the sample CSV file, enter the shipping rule, and save the file.
- Select the update CSV file, choose the warehouse, and click the save button.

Assign Products to Warehouse
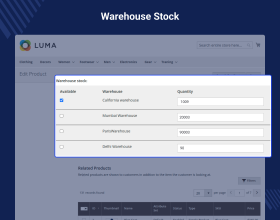
The vendors can assign their products to various warehouses while creating a new or editing a product. To assign the product to the warehouse, edit the product and go to the Warehouse Stock section. Here select the warehouses where you want to assign the product and click the save button.
- Assign products to warehouses by editing a product.
- Assign a single product to many warehouses.
- Enter the quantity of the products while assigning warehouses.

Use of Vendor Dropship
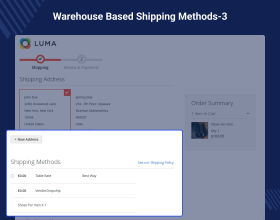
During checkout, customers can choose the shipping method based on the warehouse. Once the shipping method is selected, the warehouse shipping will update, and customers can proceed to place their orders.
- Customers can select the shipping method according to the warehouse.
- Warehouse shipping updates after selecting the shipping method.

Warehouse Manager - Manage Order
Here, the warehouse manager can see a collection of all those product orders for which this warehouse ship method is set and invoices created. By clicking the respective create link, the warehouse manager can generate the shipments.
- Here, the warehouse manager can see a collection of all those product orders for which this warehouse ship method is set and invoices created.
- The warehouse manager can generate the shipments by clicking the respective create link.

Warehouse Manager - Manage Shipping Rules
Here, the warehouse manager can add and delete the shipping rules for his warehouse. To add a shipping rule, download the sample CSV file and fill in the shipping rule as required. After that, upload the shipping rule CSV file and click the save button to save the shipping rule for your warehouse.
- Add/delete shipping rules.
- Download the sample CSV file for the shipping rules.

Features List
- Google API key is only required for auto-assigned warehouse configuration settings.
- The vendor and the admin can assign/unassign multiple warehouses to a product.
- The admin can create shipping rules using table rate shipping.
- Shipping is calculated from the warehouse location (default with only Magento base shipping methods).
- The warehouse Manager can manage shipments for his orders after admin approval
- Shipping will be calculated according to the nearest warehouse available.
- Create, delete, and assign shipping rules to various warehouses.
- Assign/unassign a single product to multiple warehouses.
- The warehouse manager will be able to add and delete the shipping rules for his warehouse.
- The admin can add, delete, and change the status of multiple warehouses.
- The admin can mass assign/unassign products to the warehouse.
- The admin can create, delete, and assign the Shipping Rule (Table Rate Shipping) to various warehouses.
- The customer can select the shipping method according to the warehouse in the same order.
- The vendor can assign a warehouse while adding or editing a new product.
- The admin can view the associated products of the warehouse.
- The admin can use filters to search vendor drop-ship orders.
- When the product is not assigned to any warehouse then also, the seller can assign a quantity to the warehouse from the order history page.
Support
For any query or issue please create a support ticket here http://webkul.uvdesk.com/.
You may also check our quality Magento 2 Extensions.
Specifications
Frequently Asked Questions
Move to Cloud Today
AWS Free tier hosting for one year by amazon web services, for more details please visit AWS Free Tier.
GCP Free tier hosting for one year with 300 credit points by google cloud platform, for more details please visit GCP Free Tier.
Azure free tier hosting for one year with 25+ always free services, for more details please visit Azure Free Tier.
In our default configuration we will provide tremendous configuration for your eCommerce Website which is fast to load and response.
Default Configuration Details of Server
- 1 GB RAM
- 1 Core Processor
- 30 GB Hard Disk
- DB with 1 GB RAM and 1 Core Processor
* Server Configuration may vary as per application requirements.
Want to know more how exactly we are going to power up your eCommerce Website with Cloud to fasten up your store. Please visit the Cloudkul Services.
Get Started with Cloud- + Features
- - Bugs
- + Compatible with 2.4.7^
- + Added GraphQl
- - Fix for assign product to warehouse from the order history page.
- - Fix the issue of module uninstallation.
- + Compatible with 2.4.6^
- + Compatible with table rate shipping.
- - Fix the checkout issue for virtual and downloadable products.
- - Fix for auto assign order to the warehouse.
- + Compatible with 2.4.4
- + Google API key is only required for auto-assigned warehouse configuration settings.
- + Seller can assign warehouse from the order page.
- + Compatible with Magento 2.4^
- + Admin can change the status of the warehouses as Active or Inactive.
- + Compatible with 2.4.7^
- + Added GraphQl
- - Fix for assign product to warehouse from the order history page.
- - Fix the issue of module uninstallation.
- + Compatible with 2.4.6^
- + Compatible with table rate shipping.
- - Fix the checkout issue for virtual and downloadable products.
- - Fix for auto assign order to the warehouse.
- + Google API key is only required for auto-assigned warehouse configuration settings.
- + Seller can update the quantity of product for warehouses from the order page.
- + Compatible with Magento 2.4^
- + Admin can change the status of the warehouses as Active or Inactive.
- + Compatible with Marketplace GST India module.
- - Fix for weight and postal code filter on the Manage Shipping Rule page at the admin end.
- - Fix the issue of order display for the guest user on the vendor dropship order page at the admin end.
- + Compatible with Magento 2.3^
- + Compatible with Magento 2.2.4^
- - Fix the visibility issue of dropship shipping method on the on checkout page.
- + Compatible with Magento 2.2.0 to 2.2.3
- + Changed how order approves works.
- + Admin can add warehouses
- + Admin can assign multiple warehouses to products.
- + Admin can add Shipping Rule(Table rate shipping).
- + Shipping calculated from Warehouse location (default with only Magento base shipping methods)
- + Warehouse Manager can manage shipments for his orders after admin approval.
- + Buyer can select shipping method according to Warehouse in the same order.
- + Shipping will be calculated according to the warehouse.
- + Vendor can assign Warehouse during add new product.
